Most owners of suburban areas, along with building a house and improving the surrounding area, are also planning to build a bathhouse. For some, it is more convenient to use the services of professional craftsmen, but for others, a bathhouse built with their own hands has a special indescribable value.
The main element of the bathhouse is the stove. Despite the large number of important details, it is quite possible to construct it yourself if you study all the subtleties and nuances of the stove business.


Peculiarities
Despite all the similarity in the functionality of furnaces, the requirements for different models will differ. A sauna stove must have high efficiency. Since it should take up little space, yet have sufficient power to heat the steam room to significantly high temperatures, heat up quickly and hold the heat for a long time.
The design of the stove is not so complicated, but there are a number of significant conditions. A very important parameter is the safety of the oven.. For example, the so-called hot stove raises the temperature of the bath room in a short time due to the fact that its walls are heated to a temperature of up to 100 degrees Celsius.


If you carelessly touch this hot surface, a burn is inevitable. In addition, in this case it is impossible to control the degree of heating, which can lead to great stress for the body and even heat stroke. Unlike conventional stoves for heating a room, bath stoves have additional elements, such as a heater or a water tank.
A heater is a container into which cobblestones of different sizes are placed. Heating to high temperatures, they help retain heat in the bathhouse and are also direct generators of steam. The stones are doused with water, the evaporating water creates the necessary humidity and a comfortable atmosphere in the steam room.
The water tank can be equipped with a tap for greater convenience. If there is no central or other water supply in the bathhouse, a container with hot water becomes a necessity for bathing procedures.


Varieties
There are a large number of stove models that you can make yourself. They differ in different characteristics. In general, sauna stoves are divided into two types - cold and hot. A hot oven, as noted above, heats up completely, including its own walls, from here the heat spreads to the entire steam room room. And if such a stove has the disadvantage that the room will overheat, then a cold stove will not have this problem due to heating only the firebox itself and the stones in the heater. But in this case, an additional source of heat is needed, especially in winter.
There is a high probability that such a centralized heater will not cope with the large volume of air in the bathhouse.


The next characteristic is the consistency of heating. Eat continuous heating ovens, they are heated during bathing procedures for an unlimited time. It is not necessary to heat it to very high temperatures; it is enough to constantly maintain the given level by adding firewood. With constant heating, the heat and humidity are stable, the room is comfortable.
Batch furnace Heat thoroughly before visiting the bathhouse. After this, the bathhouse will maintain the resulting temperature for a long time due to the stones that are located inside the heater. An interesting additional effect from such a stove is the smell, very pleasant with notes of wood, which arises from the settling of wood soot on the stones.


To make the right choice, you need to understand how different stoves are characterized.

According to the material of manufacture
The first model worth paying attention to is brick oven. Experienced builders recommend this particular material as the most optimal for a bathhouse. The biggest advantage is the quality of steam that will be produced from the heat of this stove. The heat it generates is soft and uniform, so the steam is dense, hot, but not scalding.
Another pleasant nuance for those with aesthetic taste - from brick you can create an unusual or classic interior solution, so the sauna stove will be not only useful, but also a structure pleasing to the eye.


At the same time, it must be noted that brick oven requires free space. There are, of course, small-sized designs, but still more often the dimensions of such a furnace are quite large. In addition, its installation will require an additional foundation, since the stove is heavy, which can also affect the free area of the bathhouse.
Brick kilns, in turn, also come in several types. Depending on the features of the construction, the stove will be called “white,” “gray,” or “black.”


Black sauna known in Rus' since ancient times. Once upon a time this was the only option for arranging a bathhouse and it was believed that visiting it brings health, kills illness and strengthens the body.
The point is this: a heater stove is built from stones and rubble in the bathhouse. This stove does not have a separate chimney. Due to the simplicity of their design, such stoves managed to be constructed even during military campaigns, organizing baths for soldiers. That is, the stove is lit, firewood is constantly added to achieve strong combustion, smoke from burning wood goes straight into the room.


It takes several hours to properly warm up the oven and the room. After this, the bathhouse is ventilated and the heating is stopped. Of course, the bathhouse will not be able to retain heat for a long time after the fuel burns out, but, as a rule, this was enough for washing.
After such heating procedures, everything in the bathhouse was covered with a layer of soot, shelves, walls, all possible surfaces. The soot was washed off with water, and then the stones were watered with decoctions of mint and pine needles. It was believed that this is how all bacteria and microbes are destroyed, and the air with the smell of wood and burning is very useful.


Nowadays there are again many adherents of the black bathhouse. They claim that such a bathhouse is really real, and everything else that exists at the moment is only a parody and does not carry any value for health and good spirits.
But there is an opinion that such a bath can only be organized by professional bath attendants, and for people who do not know all the subtleties and nuances of the bath business, it can even be dangerous.


For arranging a bathhouse “in gray” a chimney pipe is added to the simplest design of a heater stove. Thus, smoke and carbon monoxide no longer enter the steam room, but at the same time The heater is mounted in such a way that the smoke comes out through a container with stones. In this case, after pouring water on the stones, steam is obtained with an admixture of haze.
There will be no more soot in the bathhouse, but the unique bathhouse atmosphere will remain. This option may be suitable for connoisseurs of a real Russian bathhouse who want to avoid the disadvantages of a “black” bathhouse.


Bathhouse "white" will take longer to warm up than all those listed. But its advantage is that it retains heat for a long time.
Hearth oven- another original type of brick sauna stove. It differs from standard stoves in that air access to burning wood is from above, not from below. If, in the usual version, firewood is placed on a grate and ignited from below, then in a deck oven, ignition is done from above and the direction of draft will change from top to bottom. This device allows the firewood to burn evenly and maintain a certain temperature for a long time, in contrast to bottom-burning stoves, where the firewood flares up sharply and intensely, but burns out just as quickly.


The stacking of firewood in a deck oven must occur in a certain way: large logs are placed at the very bottom, then medium ones, and very small chips at the very top. When designing a stove with top combustion, you can refuse to install an ash pan, because with this method of combustion, the ashes after the end of combustion can simply be swept onto a dustpan with a broom.
A metal stove is a fairly common option.. It has small dimensions, can be either square or round, heats up quickly and cools down quickly. Such a stove can be bought ready-made, or it can be welded from sheets of steel, having a little experience in welding. Moreover, you can even make it yourself from recycled material, for example, pipe scraps. It’s easy to get burned on metal, so for safety reasons you can surround it with a layer of brick.


One of the types of metal stove is a sauna boiler. If a metal furnace can be of any shape and size, then a boiler is, as a rule, a cylindrical structure, small in size. The boiler can be placed in a sauna room as a source of additional heating.
Making such a design with your own hands follows an algorithm that applies to all metal stoves. The metal sheet is cut to shape, the body is welded, the firebox and heater, and chimney are installed. After this, the boiler can be lined with bricks so as not to risk getting burned by the hot circuit


According to the location of the firebox
The main technical element of the furnace is the firebox. It can be located both inside the steam room and outside.
If the firebox is located inside the steam room, this can be convenient because you don’t have to go far to add heat. But at the same time, given that, as a rule, the steam room is small, there is a huge danger of getting burned.


Remote firebox is a much more convenient and safe choice. In this case, there is a heater in the steam room, possibly with a water tank, and the fire chamber is located in the dressing room. Obviously, with this arrangement the possibility of getting burned is minimized.
To install a heat exchanger for a bath - a special separate element for heating water, you need to focus on the location of the firebox, since it can be located in the chimney or in the stove itself.

By fuel type
A real sauna, of course, is heated with wood. Firewood is an environmentally friendly material that creates that very healthy atmosphere for which everything is started. But there are also exceptions.
The stove can run on gas, the “fuel” can be electrical energy, and in other cases, a liquid flammable substance such as diesel or diesel fuel. When working out such options It is important to remember that these products are toxic and if the decision is made to heat the bathhouse this way, it is necessary to take the combustion system outside.


Electric furnace- an interesting option for those who do not want to put a lot of effort into preparing the bath and do not like to monitor the heating process. A possible disadvantage of such a stove may be that it is not at all economical. But for those who are ready to sacrifice the atmosphere of a Russian bathhouse in favor of convenience and comfort, such a stove may be an ideal option. There will be no soot from such a stove, there is no need to build a chimney, and the most important advantage is that you can set exactly the heating temperature that will be ideal for you.
The electric furnace is purchased ready-made and installed according to the instructions. If everything is done correctly, such a stove will be absolutely safe to use, the heating and cooling modes will be adjusted automatically, and it is very convenient to control all its functions using the remote control.


Gas oven also has a lot of supporters. It is easy to install, easy to maintain, safe when used correctly and very compact. This type of oven is equipped with a gas burner. There are models equipped with a water tank and a tray for stones. In such a design there is always a fuse that will prevent the gas from spreading if the fire suddenly goes out.
When installing a gas stove, you must follow safety rules. The main requirement is the distance between the furnace walls and the walls of the room (at least 50 cm). The foundation for the stove must exceed its perimeter by at least 10 cm. You also need to pay attention to the size of the burner - they must match the size of the stove. The main advantage of the gas model is its efficiency and durability. Gas-fired furnaces can last about 25 years.


The oven itself is a high-risk device, furnaces running on diesel fuel, diesel fuel and mining have a very high hazard class. Moreover, such a stove is the only option that can very quickly warm up a very frozen room, which can be a great advantage for those who visit a country bathhouse several times during the winter, for example.
Having decided to install such a unit, you must definitely resort to the help or recommendations of specialists. Since in such a furnace the oil product is heated to high temperatures, if the construction of such a furnace is done incorrectly, the fuel may ignite and even explode.

A diesel-powered stove can be double-circuit, wick or drip. Double-circuit is a kind of heat gun, which instantly warms up even the coldest room. Its fuel consumption is very high, so this type of stove is not particularly suitable for installation in a bathhouse.
A wick stove is more of a camp design. If you want to use it for heating, you need to make sure that all its parts are made of high-quality materials and carefully adjusted to each other. But such a device has very little power in any case.


A diesel-powered drip stove is the best option, which can be used for a bath room.
The principle of operation of such a device is that fuel drips into a container with a hot evaporator. The oven starts with the wick lit and the evaporator heats up. After the wick has almost completely burned out, droplets of fuel are released. Once in the evaporator container, the drops boil and the steam ignites, releasing heat.
Already existing a “potbelly stove” can be successfully converted to use this type of fuel. It is imperative that all work is carried out in strict accordance with the diagram, carried out in compliance with all safety requirements.


By heating method
The next important characteristic of a sauna stove is the type of heater device, which determines the method of heating the stones, and therefore the temperature and steam in the room. Everything is simple here.
The heater can be open or closed. In the open type, the stones are placed above the fuel compartment. It is on them that hot water is poured to produce steam. This is suitable for small spaces because frequently watering the stones causes the stove to cool down quickly. If the stove is equipped with a water tank, this design will be more convenient, since everything will be at hand.


The closed type of heater is a better option for many reasons. In this design, the stones are located behind the door. It will take more time to warm up the bath, but the stones can store heat for up to a day.
With the closed type, the fuel compartment is located outside the room, thus eliminating the possibility of carbon monoxide entering the steam room. The entire oven is heated equally, creating a soft atmosphere of even heat. With this arrangement of stones, there is less chance of getting burned by hot steam when watering them. Behind a closed door, the stones retain their heat for a long time, so the temperature in the bathhouse will remain high for a long time.


There are also original models of stoves that can be purchased and installed. These are standard designs that have been improved in various ways. For example, an aqua stove, which retains a sufficient amount of oxygen in the steam room due to the water layer that is laid in the walls of the stove.
The Kurina stove is a type of brick stove for a bathhouse, which has its own design features for more comfortable and uniform heating of the bathhouse room.

Subtleties of manufacturing
It’s easier to make a metal stove with your own hands, but if you have a lot of desire and patience, you can also make a brick one. Before starting construction, you need to have a general understanding of the basic requirements for building a stove for a bathhouse.
The stove must be installed against the wall that is located opposite the one equipped with shelves. The flue pipe cannot be designed to fit against ceiling surfaces; a gap must be left, which will then be filled with fire-resistant material and covered with a protective cover. A sheet of metal is placed on the floor in front of the fuel chamber to protect the room from the possibility of fire when coals spill out of the oven.


Brick
The most common designs of brick sauna stoves, which you can make yourself, also differ in the location of the container for heating the water. There are stoves with the tank installed at the bottom and stoves with the tank installed at the top.


Before starting construction of the furnace, you need to prepare the necessary materials:
- the brick itself;
- clay and sand;
- a bowl for mixing the solution;
- marking and masonry tools;
- insulating materials;
- Separately, you need to prepare materials for creating a chimney water tank, if you decide to do it yourself. You can also buy them ready-made.


To build a stove that will be installed in a bathhouse, bricks must be purchased of a higher quality than usual for construction. It must also have fire-resistant characteristics and have clear shapes and uniform dimensions.
So-called fireclay brick – according to its parameters, the most suitable option for a stove, standing in the bathhouse, but you need to take into account that its cost will be significantly higher than ordinary brick, so it is possible to use it partially, in the most significant places, for example, for the firebox - the place of greatest heating. And for the external walls, chimney and finishing, ordinary red brick can be used, but not of low quality.


You can easily check the capabilities of a brick if you know a few simple methods. The first indicative parameter will be sound. If you hit it with a hammer, the sound emanating from the surface should be loud and clear. If the sound turns out to be dull and as if going inside, there is a high probability that there are cracks inside the brick that make the brick brittle and fragile. In this case, your furnace risks breaking down after a short period of use.

The second indicator is the appearance of the brick. According to standards, the brick must have dimensions of 250 * 120 * 65. Deviation within the normal range is considered to be 2 mm. The brick should have no visible defects, cracks or chips. A slight presence of grooves is allowed. Sometimes you can notice a film-like coating on the surface of the product. Such bricks should be discarded, as this indicates a manufacturing defect. Such a brick will not be fixed in the right place, since the film will interfere with the necessary adhesion.
The third landmark is inside the brick. Literally, the brick must be broken into two parts and the chipped surface carefully examined. The color should be uniform and not have darker streaks or inclusions. Their presence indicates a violation of the manufacturing technology, or burnout of the brick. It is strictly not recommended to use such bricks for building a sauna stove.


When starting construction, you need to correctly install the base of the future furnace. The base must be waterproofed so that it remains cold. A sheet of roofing felt is perfect for this purpose.
The foundation should be approximately 10-12 centimeters larger than the stove. It is covered with a concrete or steel beam and a deck will be installed on top of this ceiling.


Next, you need to prepare a solution that will bond the bricks together. The mixture will require clay, sand and water. It is advisable to use clay the same as that used in making bricks. It needs to be mixed with water and left for a day. Sand is added last. The consistency should be homogeneous and thick.
To understand whether the mixture is prepared correctly, you need to move it to the side with a trowel, along the surface. The mixture should not crack, blur, or stick to the trowel; the solution should hold its shape well. There is another way. A wooden stick needs to be dipped into the solution. The layer of mixture deposited on the stick should be no more, but not less than 2 mm. It is better to prepare the solution in small portions, making a new portion after using the previous one.


After installing the foundation, when starting laying, you need to have before your eyes the drawings according to which the work will be carried out. A pre-prepared scheme for laying bricks will greatly simplify and streamline the process.
The procedure for laying bricks is standard and is rarely done differently. The first rows of bricks are usually laid in a continuous layer; this will be the so-called stove cushion. Two rows will be enough. The third row begins to be laid, based on the drawing. A grate, a blower door and an ash compartment are usually placed here. The blower door is installed using galvanized wire. The door is attached in the middle of the wall, and its lower segments are laid out on the surface of a row of bricks. The wire is hidden in grooves made on the surface of the bricks. And the upper part of the door will be fixed in the sixth row of bricks.


Next, four rows of bricks are laid in a row. Here you need to pay close attention to the alignment of the corners. The correct installation of the ash pan and grate depends on this. If at least one angle is incorrect, there will be a possibility of smoke entering the steam room. After laying continuous rows, the top of the blower door is attached to the sixth row of masonry.
The seventh row of bricks is the level at which the firebox door and grate are installed. The grate of the grate must be on the same level with the brickwork; for this, recesses are made in the bricks at the height of the grate rods. The grille is secured with mortar. The grate is tightly placed on the mixture layer and tapped with a hammer for a stronger adhesion. The grate must not be allowed to come into contact with the walls of the stove., because the grate will increase in size when heated and create pressure on the side surfaces, which can lead to destruction of the furnace. The firebox door is attached similarly to the blower door.


Next, you need to make an opening for the water tank. Considering that the tank will come into contact with the brick in some places, for the best fastening you need to wrap the tank with a cord of asbestos wire. The tank is located on the side walls.
The chimney will begin from the next row of masonry, namely the eighth, so it is necessary to install a partition there. The ninth row is where the water tank itself is mounted and the stove is installed. Next, the brick is installed according to the height of the firebox and after that the chimney is laid out according to the diagram.
The water tank can also be located above the chimney. But it is obvious that being located directly above the firebox, the container will warm up much faster.

Metal
Metal stoves have their undeniable advantages. For example, ease of installation and fast heating. This also includes small size and aesthetic appearance. But with all the advantages, we must not forget that a metal stove will be more demanding in terms of safety. Therefore, when planning to install a metal stove, you need to strictly follow the instructions and follow all installation rules.
The stove is installed at a distance of at least 0.5 meters from walls and interior items.
If a metal stove will operate using electricity, grounding must be done. When choosing this heating option, coordination with the fire inspectorate is also necessary.


The ceiling and walls of the bathhouse must be protected from fire by laying insulating material or finishing with brick and/or metal sheets.
Stone or brickwork can be laid on top of the furnace walls, which will reduce the risk of burns. An additional advantage of such cladding will be an increase in the heat retention time in the oven.


Since a metal stove is lightweight, it is usually not necessary to build a separate foundation. Such a need may arise if the oven weighs more than 750 kg. In other cases, it is enough to lay a sheet of metal or even lay ordinary ceramic tiles in place of the future stove. This layer is made for fire safety purposes.


The stove itself can be purchased ready-made, but with at least a little knowledge and skills, you can weld it yourself from sheets of metal.
In the case of a stove for installation in a bathhouse, you need to understand that the metal must be tested for strength and possible deformation when exposed to high temperatures. In order to avoid such surprises, you need to heat the metal sheets red-hot and see what happens to the sheet. It may increase in area and lose its smoothness. Then the sheet is tapped with a hammer at the places of the bumps and depressions to the original form, and the excess is cut off. This preparation will prevent the stove from warping during operation.


A metal stove most often does not include a water tank in its design. Since the oven itself is small, additional capacity will make the structure more bulky, depriving this option of its obvious advantage for small rooms. But of course, if necessary and desired, a tank can be provided.
Anyway, The container needs to be small in size, since it must have time to warm up in a short time.


The heater in such a stove can be internal or external. If the heater is installed outside, you can pour water on it to create steam. It looks aesthetically pleasing and beautiful, and heats up to high temperatures.
An internal heater allows the stones to heat up more intensely, accordingly, they will retain heat longer, but in this case the chimney path will lie in the same place and there will be a need for periodic deep cleaning of the heater from settling combustion products.
The stones themselves are also of great importance for a homemade metal stove. Granite cobblestones are absolutely unsuitable material. They contain inclusions of mica, which releases toxic substances when heated. Inhaling these toxic fumes is very dangerous to your health. Ordinary natural stones, round, approximately the same size, without cracks or chips, are best suited for a bathhouse.


You can purchase in specialized stores cobblestones made of basalt or jadeite, which are perfect for a sauna stove.
In addition to choosing the right stones, it is also important to stack them correctly. The largest and heaviest ones should be placed on the bottom of the heater, taking into account their shape. If the stones are oblong, they are laid vertically so that the upward heat can pass freely along the surface of the stone. If this rule is neglected, a natural barrier will arise for heat and the lower stones will become very hot, while the upper ones will remain cold. Medium-sized stones are laid on top of large stones and then, in the top layer, small stones.
If the stones are placed incorrectly, the steam in the room will become damp and heavy, and the healing steaming procedure will become ineffective.


As is the case with other types of stoves, when manufacturing a metal stove, the firebox can be constructed monolithically. This design is installed directly in the steam room. This option is the simplest. A large number of drawings and diagrams are available for those interested. The option with a remote firebox is more labor-intensive, but with enough patience, it can be implemented.
An important point is the design of the chimney when installing a metal stove. This compartment must be insulated. It is optimal to lay an insulating sheet between the inner and outer casing of the pipe.


Metal stoves have one interesting feature. The design of the firebox of most stoves is such that it allows you to get maximum heat in a minimum of time due to the rapid burning of wood.
A situation arises when the wood burns out and heats the stove to high temperatures that cannot be controlled. This happens because the stove is standardly equipped with a grate, which is designed to enhance combustion by supplying additional air, and therefore oxygen, through its grates. With this device, the top of the oven heats up very strongly, while the bottom and sides heat up very slightly. There are additional inconveniences in operation, because it is not much fun to engage in flame regulation instead of bath procedures.


The solution to the problem is simple, like everything ingenious - to abandon the grate completely. If the firebox door is sealed as much as possible using an asbestos cord, the firewood can be placed directly on the bottom of the stove. It is necessary to equip the door with a small hole with a damper in order to be able to control the access of air to the fire.
After such actions, the firewood in the stove will burn quietly for an hour or more, and the stove itself will warm up evenly. So a simple but effective design adjustment will make the metal stove as convenient as possible.


The most common model of a metal sauna stove is the “potbelly stove”. Such a furnace is mobile, the easiest to manufacture and operate, and is familiar even to those who are far from furnace work.
This design contains all the key elements:
- foundation;
- firebox and ash pan;
- grate;
- internal heater;
- chimney;
- water container.


Near the potbelly stove it is quite possible to equip a place for storing firewood.
To install the simplest version of this stove, you will need a welding machine, a piece of pipe with thick walls or a barrel as the body of the stove and water containers, a chimney pipe, a grate or rods for its manufacture, and insulating material.

First we prepare the base. To do this, you need to clear a section of the floor and dig a pit about 50 cm deep. Its size should be the size of the stove with an additional 30 cm around the perimeter. The bottom is lined with a layer of crushed stone or crushed brick, after which it is filled with a layer of concrete. The next layer is a roofing felt sheet. It would be a good idea to lay it in two layers, but only after the concrete has completely dried..
Two layers of refractory bricks are placed on roofing felt sheets. The first layer is on the edge. Burnt brick will provide good protection for the foundation from moisture and the effects of high temperatures.


The next step is assembling the fuel compartment. The pipe that will be used for the firebox is cut on both sides to ultimately form a cylinder. In this cylinder you need to cut a hole into which the firebox and blower will be installed. Inside the pipe you need to weld fasteners for the grate. The grill itself also needs to be welded from metal rods.
Next, you need to prepare two circles cut from sheets of metal, weld them to the top of the pipe, one and below the other, after making a hole for installing the future chimney. Doors are made from leftover metal.


For proper operation of the chimney, you must follow the sequence of its installation. The inner part must be welded to the stove and a water tank must be installed on top so that the chimney pipe passes through the tank. You need to insert a tap into one of the walls of the container. The entire remaining length of the pipe must be removed from the room. You also need to insert a valve into the chimney pipe, which looks like a metal rod with a circle attached to it. By turning the valve, you can control the incoming air.
Sometimes it is more appropriate to install a water container near the stove. In this case, the container and the fuel compartment are connected by metal pipes for circulation. This design allows you to mount a box for stones above the firebox, that is, build a full-fledged heater.


Simple homemade options
In addition to brick stoves and basic metal models, there are also extremely simplified devices for heating a bath. You can build them from available materials with minimal effort. Of course, you need to understand that such designs are unlikely to be particularly beautiful or enhance the interior, but if the goal is only to heat the room, it is quite acceptable to use such options.
When planning to build such a stove, it is advisable to prepare a drawing or diagram according to which it will be assembled.

An interesting version of the stove can be made from unnecessary rims. This heating element is simple to use, takes up little space, heats up quickly and transfers heat well. In addition, such a stove will be strong, durable and, if desired, it can be heated not only with wood, but also with coal.
The disadvantages are those that are inherent in all metal stoves - rapid cooling and the likelihood of getting burned from accidentally touching the wall. You also need to keep in mind that due to its small size, such a stove can heat a small room, ideally no more than 14-15 square meters. m, this design is not suitable for heating larger premises.

The body of the device requires 4 disks from a truck, which must first be prepared - cleaned of dirt, possibly using emery cloth. The middle of two discs must be removed, leaving only the rims. They will be used in the form of a water bottle. To do this, they need to be welded together and a metal lid should be attached to the top to fill the water, and a metal sheet should be attached to the bottom of the structure, in which there should be a hole for the chimney pipe. The resulting container should be airtight. This must be checked and deficiencies eliminated if any.
The remaining two disks are used to make the fuel compartment and the heater. You need to leave the central part in one disk; it will act as a grate. The second disk must be freed from the central segment, then when welding the two parts, the second will serve as a container for the stones.
All parts of the furnace are assembled according to the diagram, after which the furnace is installed on a previously prepared foundation.


A stove made from a deteriorated iron barrel can also be a good option for small steam rooms. To install such a stove, you first need to lay a foundation. It should be a concrete or brick base, which has increased fire resistance.
The barrel must be cut with a grinder to the required length. After this, brick is laid out from the inside. The fuel compartment is highlighted using metal profiles. Stones are poured on them. Afterwards, a lid with a welded smoke pipe is installed on the barrel.
Such a stove will heat up and give off its heat to the stones, and the smoke will fall into the cracks between them and evaporate


When planning the construction of a sauna stove, it is important to correctly assess your strengths and capabilities. Of course, a home-made stove will warm not only the body, but also the soul. But in order for such an exciting and fruitful activity to bring pleasure, a serious approach is needed.
Manufacturers of sauna stoves offer a wide range of ready-made devices that only require installation. If you still decide to build a stove yourself, be sure to take into account all the tips and recommendations.

Fire safety requirements must not be neglected. Foundation insulation must be present. It must be remembered that for stoves operating on different types of fuel, safety criteria will vary. The most unreliable option is a unit that uses diesel, diesel fuel, or liquid flammable mixtures as fuel.

It is necessary to foresee in advance how the issue of ventilation in the bathhouse will be resolved. Proper chimney installation will avoid smoke leaks and carbon monoxide poisoning.
Carefully study your family's bathing needs. Based on this information, you can decide which oven to choose. A metal stove will quickly heat the steam room, and if in your case the duration of the bath procedures is a couple of hours, then it makes sense to install a metal structure.
For those who like to steam, a brick oven would be a more suitable option., because it retains heat for a long time and generates soft, comfortable steam.

The metal walls of the stove can be lined with brickwork, you get a kind of middle option that has the advantages of both a brick and a metal stove
An excellent bath solution would be to purchase a ready-made cast iron stove followed by facing its walls with brick. The steam from such a stove will be pleasant and dense, and the stove itself will last a long time. Another advantage of this option is fast heating. But we must remember that such a stove is not installed directly in the steam room. Its firebox should be in the dressing room.


It is good when the stove is designed in such a way that there are both types of heaters - closed and open. This way there are more opportunities to bring the steam room to the desired temperature. The heater can be arranged in the form of a grid filled with stones. Less metal means less hot heat.
The stones can be laid in a certain way in the form of a well, so that water can be poured directly into the constructed recess. This will produce a large amount of good quality steam.

In addition to a good stove, it is important to properly insulate the steam room, drain for water and the entire internal structure of the steam room, including wall cladding. You may need to consider how to organize additional heating to accommodate the wishes of all family members.

The best fuel for a sauna is birch firewood.. They burn evenly and leave little waste. Coniferous trees, when burned, clog the chimney very much. It's better not to use them.
The volume of the water tank is usually calculated from the amount of 10 liters for washing one person.
Clay for the mortar used for laying bricks can be used naturally, collected on the banks of reservoirs. It needs to be soaked for several days to remove any possible impurities.
One of the main elements of any bathhouse, which ensures the creation of a special microclimate in the steam room, as well as heating the water and heating the entire room, is the stove. In this article, we propose to figure out how to build a brick sauna stove, and for clarity, we attach a number of photos and videos.
Quite often, to make using the steam room comfortable, the stove is heated from the dressing room. At the same time, heat accumulates inside the stove, which is transferred to the heater located in the steam room, and is also distributed throughout the entire room through pipes.
Please note that in order for the stove to function correctly and for a long time, you should not skimp on materials for its construction.
Types of stones
The distribution of warm air and steam inside the steam room occurs due to the stove heater. As a rule, from 1 to 5 kg of stones per 1 m 3 are laid inside a brick heater for a bath.
Important criteria that determine the choice of stones are:
- heat capacity, that is, the ability to accumulate and release heat into the air;
- melting point - or the threshold to which stones can heat up - it is desirable that this indicator be as high as possible;
- weight – it is preferable that it be high;
- strength - it is important that when heated, the stones do not become brittle and do not crumble or crack.
Basically, the types of stones chosen for the heater are basalt, quartzite, granite, diabase or jadeite (more details: " "). Each of them meets the requirements to a greater or lesser extent.

Materials that should never be used for the heater:
- marble;
- shell rock and dolomite due to the presence of magnesium and calcium carbonates;
- limestone - when sharply cooled with water, it can release gas;
- silicon rocks - tend to crumble and there is a risk of getting burned;
- ores containing asbestos, sodium or sulfur;
- sedimentary rocks.
A number of professionals use cast iron for laying the heater, which meets all the criteria for the operation of the stove.
Brick characteristics
Before you build a stove in a brick bath, you should clarify what kind of material should be used. It is preferable to use refractory ceramic bricks without cavities.
The requirements for refractory bricks for a kiln are as follows:
- Firing quality - insufficiently fired material produces a dull sound when tapped, and conversely, ringing sounds mean that the firing was carried out correctly.
- Clear geometry - rectangular shape, without cracks, chips or defects.
- Tendency to cracking - do not use slotted or sand-lime bricks.

After making sure that the material is chosen correctly, you can begin building the furnace.
Mortar for laying a brick oven
The best adhesion between bricks will be provided by a solution made from natural components, namely clay. Of course, it is optimal if the mortar is made from the same raw materials as the brick, since in this case their coefficient of expansion when heated will be the same, and as a result the oven will last much longer. However, as a rule, it is not possible to order the clay that is part of the brick.
In order for the construction of a brick oven to be sufficiently strong and durable, you should pay attention to the thickness of the seam - preferably, it should be as small as possible. Of course, too little mortar will simply not allow the brick to set. The standards provide for a maximum joint thickness of 5 mm, and if you can make it thinner, the brickwork will be much stronger.

Sand for preparing the solution must be selected according to the following parameters:
- sand added to the solution must be thoroughly sifted;
- the size of sand granules should not exceed 1 mm, and in the absence of such, as a last resort, it is allowed to use larger material, with a grain size of 1.5 mm;
- the sand must be clean, without silt or other impurities, and of uniform color.
Preparing clay for mortar
To understand how to properly build a stove in a bathhouse, it is worth dwelling on the process of preparing clay for masonry mortar. First of all, the clay layer needs to be crushed and placed in a container, filled with water. In the process of mixing this mass, all lumps must be broken. Next, the wet clay must be filled with water so as to completely cover it and left for a day to infuse. After this, the solution is filtered, and all lumps are ground.

After several grindings, the clay mass acquires a paste-like consistency. At this point you can start adding fine river sand. Moreover, the greater the proportion of sand, the less greasy the solution will be.
It is very important to choose the right proportions of the components, since a solution that is too thin simply will not set properly, and over time the oven will begin to fall apart, while a solution that is too fat, on the contrary, will begin to crack and will also destroy the brickwork.
How to set the fat content of a clay mixture
In order to determine the degree of fat content of clay, you can resort to one of the simple methods available to beginners in the construction business. And since precise digital values are used, they can be considered quite reliable.
For the dough, you need to take 500 g of clay, mix it with water and knead it by hand until you obtain a homogeneous mass without lumps that does not stick to your hands.
Note that the correct clay solution should be of medium fat content.

Method 1
You need to take a little mixture and roll it into a ball the size of a small apple. They place it on a flat surface and begin to slowly press it down with a plank until cracks begin to appear.
The quality of the solution can be judged by the size of the cracks:
- if the ball falls apart completely without cracks, then the clay is non-greasy;
- the appearance of a crack on the ball half its diameter indicates that the solution is too greasy;
- if the ball is cracked by only 0.2 diameters, then the solution is best suited for masonry.

Method 2
Two balls are formed from the clay mixture, one of which is rolled into a layer. These two blanks are placed in a dark place for 4-5 days to dry. If defects or cracks appear on the workpieces, it means the solution is too greasy. But if they remain in their original condition and are not damaged, then such clay can be safely used. You can also throw the ball from a small height - if it doesn’t break, it means the solution is good.
Bath stove laying technology
Not every builder knows how to build a stove in a bathhouse with his own hands, because this process requires not only skills, but also knowledge of the intricacies.
Before putting the stove in the bathhouse, you need to carry out a number of preliminary works:
- The finished poured foundation for the stove must be protected with a layer of waterproofing.
- The bottom rows of bricks are laid on a mixture of cement and sand.
- A metal plate is placed at the location where the door is installed for fire safety purposes.
- You need to start laying each next row from the corner.
- Before using bricks, they need to be soaked briefly in water - at least 20 seconds. Then the solution can easily penetrate into all the pores of the material.

The process technology itself, how to fold a sauna stove, looks like this:
- The clay mixture is applied in small portions and leveled.
- After soaking, the brick is lowered onto a layer of mortar.
- The surface of the brick is lightly tapped, lowered to the required depth and achieving a seam thickness of no more than 5 mm.
- Excess solution is removed with a spatula.
- A new portion of mortar is laid out nearby, leveled and the end part of the adjacent brick is covered.
- Further masonry is carried out in a similar way.
It should be remembered that the bricks in the masonry must be positioned with a 50% offset so that it is strong and does not crack. In addition, the chipped side of the brick should not be directed into the oven so that it does not deform when heated.
Construction of the firebox
Refractory bricks are traditionally used for the firebox. It is worth remembering that it is impossible to combine refractory and ceramic bricks, since they are subject to expansion to varying degrees.
Installation of grate bars
When using fireclay bricks, only fireclay clay is used. Between the bricks you need to leave 5 mm gaps, since it will expand when heated. The place for the cast iron grate must be provided with a small gap, since cast iron also expands when heated.

Note that the grate or any other cast iron elements are laid without mortar so that they can be easily replaced.
A door made of metal or cast iron must be secured with bricks during the laying process, and also additionally covered with asbestos. A single-wall partition is built as a chimney. A sandwich pipe with insulation is installed inside.
How to dry the oven
The oven can be used intensively only after it has completely dried. To do this, open all windows and doors in the room to allow air to enter. After 4 days, you can heat the stove with small wood chips, but not longer than 15 minutes. Several approaches per day are allowed. If there is condensation, the oven has not dried out yet.
Thus, if you follow the instructions and tips, laying a brick oven yourself is not so difficult. In addition, you can always find high-quality materials with good characteristics on sale. But you will save significantly on professional services, and the bathhouse will always delight you with warmth.
When creating a bathhouse, the question of heating it always arises. When choosing from ready-made options, it is better to give preference to the one that will not only be of high quality, but also economical. If you don’t have the funds to build a stone heating source, you can make a sauna stove with your own hands.
Requirements for metal heat sources
When making a stove yourself, it is important to keep on hand the necessary tools, a set of drawings for the construction of homemade sauna stoves, and have experience as a welder. When working with steel sheets, keep in mind that at a temperature of +150 degrees, a change in the properties of iron occurs, at +250 its endurance under constant loads disappears, and at +550 the steel becomes dark brown, which indicates a change in linear properties.
You need to work especially carefully when heating the metal to +900 degrees! At this temperature, unwanted deformation of the future furnace is possible.

Taking these nuances into account will ensure:
- long-term accumulation of thermal masses;
- warming up the bath and raising its temperature in a short time;
- high level of safety for people washing themselves.
In addition, these ovens do not require much space due to their small size.
Pros and cons of metal stoves
The bathhouse must maintain a temperature of +50 degrees. For this purpose, it is recommended to install homemade metal sauna stoves. Their use has the following advantages:
- small-sized structures, which is important for small rooms;
- you cannot suffocate, since such an iron “homemade product” removes combustion products through the chimney pipe;

- Due to the high heat transfer coefficient, the steam room quickly warms up. On average about 1.5 hours;
- shelf life, which directly depends on the quality of the work performed and materials;
- absence of smoke when lighting a bath with raw wood;
- low cost.
Such homemade metal stoves also have some disadvantages:
- small dimensions of the structure exclude use in spacious bath rooms;
- rapid cooling period. In order for the stove to heat, the heat must be constantly maintained;
- high probability of ignition of objects located near the walls of the structure.
Types of metal furnaces
There are 3 options:
- Open – with a small volume water tank and an open heater. To enhance the heat capacity coefficient of such a sauna stove, you will need to cover the stones with a galvanized lid.
- Closed. To increase the heat capacity, the outside and inside are laid out with refractory bricks using metal fasteners, and a special grate is placed.
- Combined. With this option, a complete set is formed: 2 valves, a firebox, a grate, 2 pipes (10 cm and 14 cm in diameter), a blower and 4 holes are provided for a pipe and a bypass elbow. For this, steel sheets about 0.5 cm thick are used.

Sauna stoves also come in cold and hot types. The first is suitable for heated rooms. It is impossible to get burned on its walls, since they only warm up to +50 degrees. The second option does not allow you to control the temperature in the bathhouse and is used when using the steam room irregularly.
Types of stoves depending on the type of fuel:
- electrical - housing with heating element and special elements for heat insulation;
- wood-burning A lot of wood is needed as fuel, a long time to warm up the room and constant monitoring;
- gas. They are convenient and reliable thanks to the presence of a safety device that reacts when the gas supply level decreases or when it is completely turned off.
 Metal wood stove
 Features of heating sources for baths and saunas
In a traditional Russian bathhouse, it has long been customary to provide a lot of steam and less heat. For this purpose, a closed heater is used, located above the firebox. It is lined with heat-resistant brick on the inside while maintaining a small air gap. For such a bath you need to heat the stones up to +500 degrees.
The Finnish sauna requires a low level of humidity - 5-15% and a temperature range of up to +85 degrees. The heater is used open, with slightly heated stones. To supply steam, just pour water on it.
Main components of metal furnaces
Their presence is provided in all bath structures.
Firebox
This is a two-chamber device. The upper part (furnace) is necessary for burning fuel, and the lower part (ash pan) is necessary for accumulating and collecting ash. These two compartments are separated by a grille, and each of them has a door. Often the lower compartment is left open for air flow, using it as an ash chamber. You can also make holes in the firebox door (dimensions 20x25 cm) with a damper to regulate the air supply.
Kamenka
Above the firebox door, located opposite the entrance, rods measuring 1 cm or more are fixed. The door of the heater itself should “look” at the steam room. Next, stones without mica content are placed in it. It is undesirable to use granite. The more cobblestones, the larger the hot surface.  Firebox
It is better to mount a hatch in the upper part of a sauna stove made of metal with your own hands to create access to the bottom of the compartment and ensure maintenance of the heater. A chimney cover is installed above it. The last stage is the installation of a water tank.
Chimney
This is a pipe for removing the resulting smoke and heating the water supplied to the stones. The chimney must be insulated, as due to its high temperature it is easy to get burned.
Its dimensions must correspond to the dimensions of the iron stove. The thickness of the passages should be equal to half a brick.
It is better to purchase a chimney already assembled with an outer pipe, an internal chimney, and a deflector.
Tank
It is mounted above the firebox. A tap is built into its lower part to gradually supply liquid to the hot stones. On the chimney side, the tank is covered with a steel semicircle with a hole for the chimney pipe. A lid with a handle is mounted on the part of the container that will be filled with water. Just like the chimney, it is better to buy a ready-made tank.
Additional items
These include doors and grilles. To save time, they are purchased ready-made.
Making metal stoves with your own hands
There are many drawings and options, but the set of constituent elements is approximately the same.
Tools
To get started you will need to prepare:
Grate for the furnace
Important nuances
You first need to determine the location for the future structure. If necessary, a foundation and two rows of bricks are laid. A pit 70 cm deep is made under it. Its bottom is sprinkled with sand and broken bricks on top. Next, the frame and formwork are installed, after which the surface is filled with concrete.
 Foundation for a metal sauna stove
 Important to remember:
- the gap between the stove and the wall is at least 1 m;
- Foil must be attached to the wall near the structure;
- it is better to make a chimney from a sandwich pipe with a heat-insulating layer;
- at the junction of the roof and the chimney it is necessary to form a passage unit;
- It is better to surround the structure with bricks to prevent burns.
Stove-heater
This simple variety has several ways to create it.
Option 1
Using an iron barrel without a bottom or top. The resulting container is half filled with bricks placed on edge and a grate laid on top. Stones are placed in the remaining 2/3 of the space and a chimney is installed. At the end, such a homemade stove in the bathhouse is covered with a lid made of sheets of steel.
Option 2
Bricks are not used for the construction of the stove. Sequence of work:
- Prepare diagrams and necessary tools.
- In a long pipe, cut a hole for the blower with dimensions of 5x20 cm. Inside the pipe above it, fix the mount for the grate.
- For the firebox, make a hole 25x20 cm. Above it, mount fastenings for rods, the size of which is about 1 cm.
- On the other side of the oven, create a hole into which the liquid will flow. Place stones in the heater.
- Make a slot for the chimney. Install a tap at the bottom of the pipe.
- Form a lid on the heating tank with a slot for the chimney, a hinge and a handle.

Option 3
This stove has 2 heaters. It is made by analogy with the previous ones. The difference is that 4 plates are used to connect two heaters.
Other possible varieties
In addition to stoves, the following are relevant: 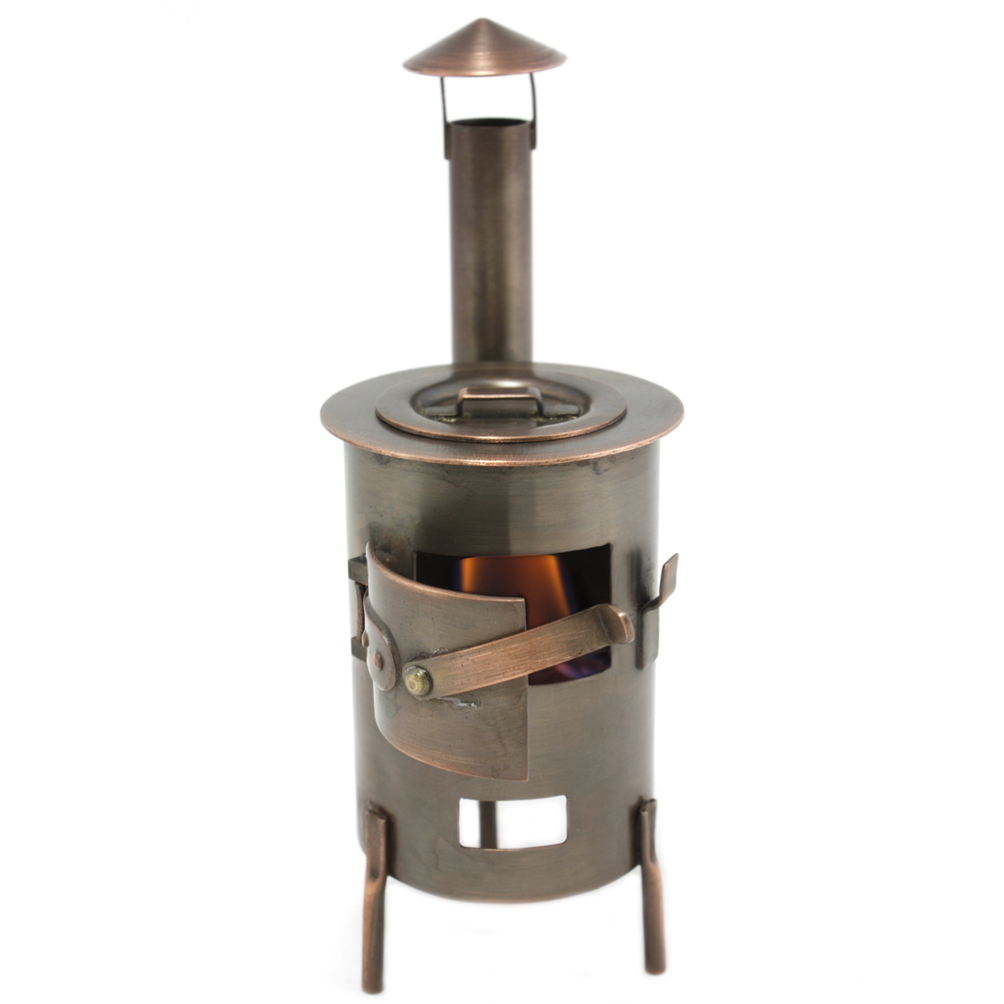 Potbelly stove
- a conventional horizontal oven. A propane cylinder and scrap metal scraps are used. Openings for the doors and chimney are cut, a grid of grates is fixed to the corners, and the lid is installed in its original place. Legs and doors are installed;
- vertical boiler for a bath. It consists of a firebox, a water tank and a closed heater. It will be necessary to pre-form blanks for the bottom of the lid and partitions, and carry out the process of welding round grates. The constituent elements are made according to the scheme described above.
Many drawings of sauna stoves made of metal provide for horizontal and vertical design options with the firebox opening into a separate room, with a closed and open heater. A homemade potbelly stove is also common. This is an ordinary metal box with a door and a pipe. It requires a lot of fuel with a low heat transfer rate.
Final finishing
Regardless of the type and size of the sauna stove, the structure must be treated with heat-resistant enamel. To do this, the surface is degreased, and then the organic composition is applied in several layers. 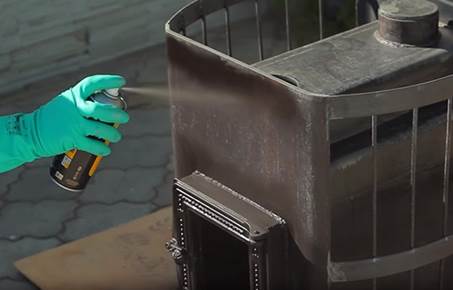 Application of heat-resistant enamel
Finished furnaces cannot be put into operation immediately. First of all, forcefully or naturally dry the bathhouse.
By following these tips and having experience in welding, you will get a stove that will bring you joy for many years. Choose an option that will optimally fit into the bath room and will not “eat up” additional space.
There is probably not a single owner of a country house who would not want to build a real Russian or Finnish bathhouse on his property. To ensure that expectations coincide with reality, it is necessary to carefully consider the equipment and layout of the structure. And you definitely need to choose and install the stove correctly, because it is the heart of any steam room. Of course, you can buy a ready-made unit, but will the standard design allow you to realize everything you have planned? It is best to build a sauna stove that will fully meet all the owner’s needs with your own hands.
Homemade stoves for a wooden steam room: advantages and disadvantages
Almost all existing designs of homemade sauna stoves are not inferior to factory units in terms of appearance, efficiency and performance. In addition, they are easy to maintain and durable.
As for the possibility of saving space in the steam room, a home-made structure can be fit into an existing room more rationally. Although the choice of stove type depends mainly on the specifics of use (for example, if the bathhouse is two-story, then the stove can serve as a source of water heating) and the arrangement of the bathhouse premises, several general requirements can be identified:
- Sufficient thermal power and the ability to adjust it.
- Operational safety.
- The presence of additional elements for redirecting convection currents.
- Possibility of adjusting temperature and humidity.
All modern units for equipping steam rooms can be divided into two types according to the material of manufacture:
- brick stoves;
- metal heating devices.
To understand their performance characteristics in more detail, let’s take a closer look at each option.
Brick stoves for frame baths
Burnt brick has long been considered the best material for building sauna stoves. Even today, despite the availability of simpler and cheaper options, many people prefer a brick building. And not so much for its solid and presentable appearance, but for the ability to create an indescribable atmosphere of home warmth and comfort. No less important are other advantages of brick heat generators:
- High heat storage capacity. The stove heats up quickly and even after the fuel has completely burned out, it retains heat for 6–8 hours.
- Possibility to heat rooms of any size. Sauna stoves can have dimensions sufficient to heat structures with several rooms, including a steam room, a locker room and a room for gatherings with friends.
- If the operating rules are followed, a brick stove is safer than any other open-flame heating device.
Such a stove is not without its drawbacks, which you have to pay for the unique atmosphere and comfort. And, I must say, they are no less significant than the advantages:
- Difficult to install. To build such a furnace, bricklaying skills are required.
- Higher cost. Most often, this factor is due to the need to buy refractory materials and furnace castings.
- It takes a long time to heat up, so you need to melt it in advance.
- Big sizes.
As you can see, brick is far from a clear choice for building a sauna stove. However, if you want to create not just a steam room, but a full-fledged place for rest and relaxation, then this design is optimal. In addition, it is quite possible to build it with your own hands, if you use the procedures and drawings of existing furnaces.
Metal sauna stoves
Some lovers of steam baths consider a metal stove in a bathhouse unacceptable for use. Nevertheless, it is necessary to seriously consider this option, since it has a lot of undeniable advantages:
- The metal stove is compact and can be installed anywhere.
- Installation takes a minimum amount of time. If you know how to use a welding machine, such a furnace can be built in a few hours.
- Low cost. To make a stove it is not necessary to buy sheet metal. You can use various metal containers, pipe scraps, car rims and other scrap metal.
- Instant heat dissipation. A steel stove begins to radiate heat immediately after lighting, and will warm up the room in a matter of minutes.
If we talk about the disadvantages of iron sauna stoves, there are few of them. The faster it warms up, the faster it cools down. The temperature in the room will begin to drop immediately after the wood burns out. Of course, a massive heater can alleviate the situation somewhat, but even with it, metal stoves cannot compete with brick stoves in terms of heat transfer. Another disadvantage is the danger of getting burned on hot walls, although this can be easily eliminated by installing a protective screen.
The best option, capable of combining all the advantages of metal and brick sauna stoves, are combined ones (made of steel and lined with red brick). At the same time, the requirements for the tightness of masonry joints are reduced, and there is no need to construct a massive foundation.
Choosing a stove for a steam room: types of designs
To make the right choice, you need to have an idea about other features of sauna stoves. Today we can talk about classification according to the following criteria:
- heating rate;
- layout features;
- method of heating the heater;
- fuel used.
Depending on the temperature of the outer walls, all sauna stoves can be divided into “hot” and “cold”. In the former, the surface temperature reaches more than 100°C, which allows you to very quickly heat a large area. Such a stove is indispensable if the steam room is used occasionally, and constant heating is not provided in it. But the advantages of such structures also entail significant disadvantages. Firstly, touching hot walls can cause burns. Secondly, rapid heating is difficult to control, so the likelihood of accidental overheating of the air increases, and, as a result, getting heatstroke.
“Cold” stoves require longer heating, but the temperature of their walls, even with the most intense flame, does not rise above 50–60 degrees. It is impossible to accidentally burn yourself on it. In addition, the ability of “cold” stoves to accumulate heat allows you to maintain the desired air temperature for several hours. This makes it easier to operate structures intended for regular use. It is also important that heating extended over time allows you to set the optimal temperature and humidity in the room.
As for the layout, there are options for placing the stove both in the steam room itself and in the dressing room. The first design is certainly cheaper and easier to install. However, it has several disadvantages. So, when opening the door to add fuel, smoke may come into the room. In addition, due to high humidity, it will not be possible to store firewood next to the stove, and each time it will not be very convenient to run to another room to get it. The safety of the structure will also suffer, since in a cramped steam room the risk of touching a hot door increases many times over. Therefore, it is better to install an external combustion part, which can be placed in an adjacent room, and leave only the heater in the steam room. Of course, this option has the right to life only if the bathhouse has sufficient area.
If we talk about the method of heating a heater, today stoves in which the stones do not come into contact with the fire are especially popular. They are placed in a special enclosure welded to the casing of the heating device, or in metal baskets that are placed on the walls or chimney. In this case, the temperature of the stones reaches 400 degrees. The advantage of this method is the ability to heat the stove and regulate air humidity simultaneously with taking water procedures.
Batch ovens are designed in a completely different way. In them, the stones come into contact with combustion products, so they are heated to a very high temperature - 1000°C or more. But you can begin health measures only after the firewood has completely burned out and carbon monoxide has been removed from the interior of the stove. And in order to prevent the heater from cooling quickly, it is covered with a casing or a hinged door.
Often, sauna stoves are also equipped with a water tank. It is installed mainly on the back of the structure, passing the chimney through the container. Thanks to the lower heating and high temperature of the flue gases, it is possible to obtain water in quantities sufficient not only for rinsing, but also for full-fledged water procedures in a wooden font.
Knowing all the features of sauna stoves, it is not at all difficult to choose the right design, focusing on the features of a particular building, operational requirements and personal preferences of the owner.
Calculations, diagrams, drawings
Some craftsmen prefer to build a sauna stove “by eye,” arguing for the simplicity and undemanding nature of the structure. But the thermal regime and quality of the steam depend on how correctly it is designed (if desired, you can always install a steam generator in the bathhouse). For example, with excess power, the air in the steam room will heat up very quickly, but the stones will remain cold for a long time. If the performance of the heating device is not enough, it will constantly overheat, which will quickly disable it.
The parameters of a sauna stove are calculated based on the actual cubic capacity of the room. To determine the volume of a steam room, three quantities are multiplied - its length, height and width. After this, adjustments are made related to the characteristics of a particular structure. So, for bathhouses with a bare frame, the obtained value must be increased by 1.5 times, and for each uninsulated square meter of surface (windows, doors, etc.) 1.2 m 3 is added to the volume of the room. For example, the actual volume of an unclad building measuring 2x2x3 m with a window (1x1 m9 and a glass door (1x2 m) (taken equal to V = 2x2x3x1.5+1.2+2.4 = 21.6 m3.
Experienced stove makers calculate the power of the stove based on the fact that for each cubic meter of the actual volume of the steam room, 1 kW of energy will be required. So, in our case, a 20 kW heating device is suitable. To calculate the size of its firebox, the resulting power is multiplied by 2. For example, in the example discussed above, a firebox with a volume of 40 liters will be required. As for the linear dimensions, the height of the combustion chamber should be no more than 2/3, and the depth should be no less than 2.5 of its width.
Photo gallery: projects of wood-burning sauna stoves
The order of a small sauna stove will help to correctly calculate the material  Metal heater stoves can have a different location of the water heating tank
  The drawing of a stove for a steel bath needs to be made as detailed as possible
  Arranging a stove with an open heater will greatly simplify the masonry process
  A vertical sauna stove fits perfectly into a small room
  For a bath you can use pipes of any diameter
  The size of the steam room stove depends on the area of the bathhouse
  The chimney can also be placed on the side
Materials and tools
In order to build a brick oven, you will need:
- red and fire bricks;
- clay;
- sand;
- blower door;
- combustion door;
- grate;
- cleaning doors;
- asbestos cement slab;
- stones.
Since a brick oven requires a solid foundation, it is necessary to pour a reinforced concrete foundation. To do this, additionally prepare cement and crushed stone, as well as metal mesh or reinforcing rods.
The sauna stove can be made of either brick or stone, using pieces weighing from 1 to 5 kg. Rubble, granite or smooth stone are suitable for these purposes, but flint should not be used - when heated, it cracks into pieces.
In your work you will need traditional stove maker or mason tools:
- trowel;
- hammer-pick;
- bubble or laser level;
- mooring cord;
- plumb line;
- construction square 40x40 cm
- tamping;
- plaster rule;
- containers for solution and bulk materials.
To trim bricks, you can use a grinder with a stone circle. This will allow you to perform the masonry more accurately than when working with a hammer-pick.
If your choice is a metal stove, then prepare:
- sheet steel 1 and 5 mm thick (it is better to use heat-resistant varieties);
- grate;
- metal corner with shelf 40–50 mm.
The doors can be made from the same metal or you can use store-bought ones, hanging them on hinges and latches. As a chimney, you can take a steel pipe with a diameter of at least 100 mm. Its length should be at least 4 m - this will ensure good traction. By the way, a metal chimney can also be used for a stone stove.
As for the tools, to build a metal heater you will need:
- welding transformer or inverter;
- angle grinder;
- cleaning and cutting wheel for metal;
- electric drill with a set of drills;
- roulette;
- scriber.
If the design of the sauna stove includes a tank for heating water, then you should additionally take care of a piece of large diameter pipe, threads and taps that may be needed to install a hot water supply system.
Preparatory work
Work begins with preparing the construction site. If the stove is installed in the wall between the steam room and the dressing room, then part of the wall is cut out. When placed in a corner, the walls are protected with mineral thermal insulation, after which they are lined with red brick. When choosing a location, you should definitely consider how the chimney will be installed - perhaps its installation will be hampered by floor beams or rafters.
How to correctly calculate and install the foundation
You should be aware that even a small metal stove is an impressive structure, not to mention brick structures weighing hundreds of kilograms. Therefore, the first thing to do is to build a strong, reliable foundation.
To build the foundation:

If you plan to install a metal stove with subsequent lining with red brick or stone, then the dimensions of the foundation must take into account the dimensions of the final structure.
Rules for preparing the solution
For laying a brick heater, you can use both factory mixtures and a simple clay-sand mortar. River sand and fatty clay are best suited for its preparation - it is more plastic, and during the drying process it forms a strong seam. To determine the amount of both components, an experiment is carried out. To do this, small parts of clay and sand are mixed in different proportions, after which balls with a diameter of about 5 cm are rolled out of the solution. Lumps of clay, dried for several minutes, are squeezed between two wooden planks, observing the beginning of cracking of their surface. The optimal composition is considered to be one in which the ball began to collapse only after it was compressed to 2/3 of its original size. If this happens earlier, then the amount of clay in the solution must be increased.
To obtain a high-quality solution, the clay is cleaned of impurities and thoroughly kneaded. After this, it is soaked in cold water for 24 hours.
Another way to determine the quality of the masonry mixture is to lower a wooden spatula into a bucket of mortar. The mixture should not drain immediately after removing the tool from the container - this indicates an increased sand content. If there is a lot of clay, the composition will spread unevenly over the surface of the blade, forming lumps. The optimal composition forms a layer 1.5–2 mm thick.
Cutting blanks
To build a metal furnace, a steel sheet with a thickness of at least 4 mm is used. To cut it with a grinder, you will need a lot of time and effort, in addition, you will have to spend more than one abrasive disc. If possible, it is better to cut the metal in advance using a gas cutter or plasma cutter. Even if you or someone you know does not have such equipment, do not despair. Now, any nearby enterprise or car service center will have everything you need, including a specialist who can help you.
Step-by-step instructions for laying the walls of a brick sauna stove with your own hands
The design of a good-quality and simple “cold” heater differs slightly from other brick stoves. The firebox is made of fireclay or other fireproof material, and an ash pit is installed under it. In the ceiling between the working chamber and the blower there is a grate necessary for supplying air to the combustion zone.
The differences concern only the arrangement of the heater. It can be installed “white” or “black”. In the first case, the stones are laid on top of a metal plate, while in the second type of stove the heater is in direct contact with the fire, as a result of which they heat the room much faster and provide hotter and drier steam (if desired, you can use a steam generator in the sauna).
Drawings and instructions for one of these furnaces give a complete picture of its internal structure and the features of the flue.
The following instructions will help you lay out the walls correctly:
- The prepared foundation is covered with roofing felt, after which the “basement” or zero row is laid out dry. It is made entirely of red brick. The appearance of the sauna stove depends on how level the base is, so you should constantly monitor both the level of the structure and its geometric parameters.
- The first and second rows lay out the shape of the stove and the configuration of the niches under the ash pan and heater. They are advised to be made from fire-resistant red brick.
- An asbestos cement sheet measuring 550x650x10 mm is laid on top of the second row. It will form the bottom of the ash pit.
- In the third row, the same stove is installed on the other side, under the firebox.
- In the fourth row, a niche is laid out under the heater and the base of the combustion chamber is laid. The underneath and walls are made of fireclay bricks, after which a grate is installed.
- The fifth row extends the combustion chamber and partially covers the bottom of the heater. A small opening in its lower part will be needed to drain excess water.
- In the seventh row, a layer of stones is laid and the fire door is installed. To do this, pieces of steel wire are threaded into the ears cast on its frame. Then the cast iron part is installed in place and fixed with bricks, supports, etc. Before performing the next row, the wire is straightened and placed in the seams.
- In the eighth row, a channel is laid out that connects the firebox to the interior of the heater. Thanks to it, hot gases will be directed to the stones.
- Before laying the ninth row, a horizontal valve for the direct gas duct is installed.
- In the tenth row, a vertical damper is installed, through which the heater can be isolated from the chimney. This will allow the flow of gases to be directed into the chimney along the shortest path. The rest of the stones are laid out here, after which the heater cover is made from a steel sheet 1 mm thick.
- The combustion chamber is covered with a cast iron plate. Asbestos cord or basalt cardboard is used as a seal.
- The eleventh and twelfth rows finish building up the furnace mass, preparing the base for the chimney.
The grate bars are not fixed, so to ensure their stable position, grooves are cut in the bricks of the bottom row.
After the stove is folded, install a water tank and a chimney.
Construction of a small iron stove
If you have even the most minimal experience in welding, a metal sauna stove can be built in just one day. The small dimensions (the length, height and width of this model are 900x800x600 mm) allow you to install the heater even in the smallest steam room.
The production of the stove is carried out in stages:

The sauna stove is installed in place and filled with stones, trying to lay them as densely as possible. After this, focusing on the height of the heater, the top cover is made from metal 1 mm thick. The stove can be heated immediately after connecting the chimney.
Video: how to weld a metal sauna stove with a boiler
How to cover a steel structure with hollow bricks: building a combination oven
If necessary, a metal heater can be lined with stone or hollow red brick. Thanks to the increased storage capacity, the heat from the stove will emanate much longer, which is especially important for devices with a heater equipped “in black”. The decision to encase the stove in a brick shell is made at the design stage, since the increased dimensions of the structure require the necessary allowances when arranging the foundation. While working, you should adhere to the following tips:
- For masonry, only heat-resistant mortar is used - natural clay or a factory-made heat-resistant oven mixture.
- The distance from the brickwork to the metal walls must be at least 100 mm. The air gap will protect the shell from high temperatures and make it possible to retain heat for several hours longer.
- Vents are left in the lower and upper parts of the barrels - special openings, thanks to which the intensity of convection significantly increases.
- The outer casing can be made either solid or by laying bricks in a checkerboard pattern.
In order to save material, the brick can be laid not flat, but on the edge. Of course, the heat capacity of such a casing will be lower. By the way, you can convert the oven into a “colder” category by installing external screens made of metal sheets. They will prevent you from getting burned on the hot walls and will enhance convection heat transfer.
Other design elements
Putting the stove back in place is not enough. It will function only if there is good draft, which will be provided by a properly constructed chimney. In addition, in a real bath there should be not only dry steam, but also a sufficient amount of hot water. To do this, the furnace is equipped with a tank for heating it.
Installation of a chimney (stove pipe) in a Russian bath
Its design depends entirely on what oven it is intended for. Thus, a massive brick unit needs a pipe with an increased flow area, while even a chimney with a diameter of 100 mm will provide draft in a small heating device. When calculating a chimney, experts recommend starting from the size of the blower opening, taking its cross-section equal to 1/2 the area of the window for air supply.
The thickness of the chimney walls, as well as the cross-section of the internal channel, should not be less than half a brick. During the construction process, two types of mortar are used - clay for building up the pipe array indoors and cement or lime for working outside. Thanks to the latter, masonry joints will not collapse under the influence of moisture.
Although the installation of a chimney for a sauna stove is subject to more relaxed requirements than for heating appliances in residential buildings, it must rise above the roof level by at least 0.5 m.
The stove can be equipped with a metal or asbestos pipe. It is important to make its lower part heat-resistant, for which a thick-walled steel or cast iron section is installed at a distance of at least 1 m.
Installation of a hot water barrel (liquid heat exchanger)
The sauna stove can be equipped with an open or closed water heating tank. If the building is connected to a water supply system, then it is better to install a sealed container, be sure to equip it with a safety valve configured to operate when the pressure in the system exceeds 3-4 atm. Otherwise, you will have to fill the water heater manually, through the opening in its upper part.
Heating the water in the tank is carried out in two ways. The first is that the container is installed at the back of the firebox or above it. The second involves installing a water heater on a chimney. Passing through the internal channel, heated gases give off their heat, quickly heating the water to a high temperature.
To make a boiler, use a steel sheet with a thickness of at least 3 mm, welding its joints with a continuous seam. The pipe that is installed inside must be thick, otherwise, due to high humidity and temperature, it will quickly become corroded.
If the building has running water (for example, if your frame bathhouse has a bathroom), then the tank can be replaced with a liquid heat exchanger. Its contour is welded from steel pipes with a diameter of up to 1 inch, installing the structure at the rear of the firebox. To prevent water from boiling, the heat exchanger is equipped with a bypass valve, from the outlet of which a pipeline is laid to the heater.
Video: how to lay out a brick stove with a built-in water heater
How to finish the stove depending on its type
External decoration will help to give the sauna stove individuality. It can be done in various ways - from simple jointing of brickwork to cladding with marble or granite slabs. It all depends on the taste and financial capabilities of the owner.
Photo gallery: examples of finishing stone and iron stoves of different sizes
 The stove, lined with glossy slabs, looks like a fireplace
  Finishing with natural stone can be very unusual
  The firebox in the form of a fireplace portal looks unusual
  Granite is ideal for lining a sauna stove
  Flat stone can be used to decorate not only the stove itself, but also the adjacent wall
  A wooden fence, although not a full-fledged finish, can protect against burns
  A large structure can be built from facing bricks and simply unstitched seams
How to heat a stove with wood
Before heating the stove, it is necessary to close the heater channel and open the direct flue damper. This will significantly increase traction. Then firewood is placed in the firebox and afterburning is done using paper or rags soaked in kerosene or barbecue liquid.
After the firewood has ignited, it is necessary to open the valve of the channel that connects the firebox to the heater and close the direct gas duct. At this time, the stones should be covered with a lid.
The stove is heated until the temperature in the steam room rises above 60°C. After the firewood has completely burned out with a poker, be sure to check whether there is any unburnt wood in the corners of the firebox. If such pieces of logs are found, then you need to throw them away, otherwise they will smoke. The heat must be checked for the presence of blue flames. If they are, then you still can’t take a steam bath, because you might get burned.
Burning coals are thrown away in the same way as unburnt wood. After this, water is poured onto the heater, which will remove soot from its surface, and the walls and shelves of the bathhouse are washed from soot.
Video: how to choose a stove for a Russian bath and a Finnish sauna (advice from experts)
There are currently many metal sauna stoves on the market, but they are all expensive. If you have good experience in metal welding, then you can make an iron stove for a bathhouse with your own hands. In this article we will describe in detail, attaching relevant photos, how to do this, having your own dimensions and drawings.
Differences between metal stoves for baths and saunas
Steam rooms in a bathhouse and a sauna differ significantly from each other. The sauna is accompanied by high temperatures - over 85 ºС. Such indicators make it impossible to greatly increase the humidity, since skin burns are inevitable. At the same time, the broom crumbles in such conditions in just 5 minutes. Therefore, the humidity is adjusted to 5-15%. The Russian bath has a temperature in the region of 55-65 ºС, which makes it possible to raise the relative humidity to 50-60%.
To create certain conditions in the steam room, different stoves are used, and different approaches to their installation are also used. If you are setting up a sauna, you will need to maintain the maximum area of contact between the stove body and the air and ensure rapid circulation of air flows along the walls.

It all comes down to heating the air in the steam room as quickly as possible. A small open heater, located above the firebox, can heat the stones to 200-250 ºС. It makes it possible to get a little steam - as a rule, this is enough for a sauna, because you only need to achieve 15% humidity.
In a Russian bath, a different microclimate is created - low temperatures are reached and a lot of steam is produced. Moreover, it should consist of very small droplets heated to 130-150 ºС - such steam is called “dry”. Such a microclimate gives the body lightness and strength. “Dry” steam can only be obtained by heating stones to values of more than 500 ºС. To achieve such indicators, stones are placed in a firebox, that is, in a closed heater.
Do-it-yourself stoves for Russian baths
The most important thing when making metal sauna stoves according to drawings with your own hands is to take into account that it is impossible to maintain the required temperature within 60-65 ºC with heated metal walls (read: “Drawings of a metal sauna stove - building a stove with your own hands”). You will definitely have to reheat it, which is accompanied by the emission of strong IR waves, which makes it quite difficult to be near the stove.
There are two ways to solve this problem:
- Lining the firebox. The process involves lining the inside of the firebox with refractory bricks. It is enough to lay it on edge, and the thickness of the lining will be 6 cm, although narrow fireclay, 3 cm thick, is also found. Be that as it may, the heating of the steel walls is insignificant; the heater warms up the most. Therefore, you should immediately design the firebox so that it is larger in size, since most of its volume is allocated to the lining. The disadvantage of this method is that it produces hot smoke, which reduces fire safety. It is best to cool it by installing a tank or heater on the pipe. It is a little more difficult to install a heating shield, passing through which the smoke cools down to 80-120 ºС.
- Install a brick screen around an iron stove for a bath. It is assembled from ceramic bricks, while windows are left in the wall for mounting doors, which will allow you to control the level of air heating in the future. We can conclude that this option is the best due to the ability to regulate the temperature, but it is less practical, since the back wall overheats very much, so it is necessary to include heat-resistant steel in the design. In this case, it turns out that for a longer service life of an iron sauna stove, you need to choose a fairly thick metal. As practice shows, it is better to install it in the upper and lower parts of the firebox.

Separately, it is worth mentioning the seams. A homemade iron stove for a bathhouse quite often begins to burn out precisely because of poor-quality seams. In production conditions, this problem is solved by using a bent structure. They try to minimize the number of seams on top of the stove.
When making a metal stove for a bathhouse with your own hands, it will be almost impossible for you to bend 6-10 mm steel, so, as a rule, all that remains is to make extremely high-quality seams.
What size is the heater and in what place is it better to place it?
The required volume of stones is determined by the size of the steam room and the quality of insulation. The value, as a rule, varies from 20 to 40 kg per 1 cubic meter of room. Naturally, the more there are, the easier it is to produce the required volume of steam.
Due to the fact that different stones differ in density, with the same mass they will occupy different volumes. It has been determined that for a steam room with a volume of 12-14 m 3, it will be necessary to install a heater 30x40x30 cm. These dimensions can be slightly adjusted in different situations.
When making a sauna stove from metal with your own hands, you will need to select the individual volume of the heater based on the size of the stove. To avoid mistakes, it is better to start from ready-made drawings. When using an experimental approach, it is worth considering that the volume of the firebox should exceed that of the heater by approximately 30-50%.

Before building a stove in a bathhouse, it is worth calculating the best location of the heater in the firebox. From practice it became clear that it is best to place it on top, near the back wall, where the temperature is highest.
It is worth remembering that the heater will need to be maintained, and it should be equipped so that water can be supplied there. The hatch is best positioned so that you can easily reach the farthest edge with your hand, and so that water can be supplied without the possibility of getting burned.
As a rule, tubes are added to the heater, placed inside the container, which would reach all the stones. On the water supply side, the tube is equipped with a funnel. After the tubes are separated, they are lined with stones. After water is supplied through the tubes, it hits the stones in the heater and turns into steam.
Drawings of homemade steel stoves for a bath
Let's consider a stove option that will be relevant for a steam room with a volume of 2 × 3 × 2.3 m. For its construction, 3 mm thick steel sheets are used.
To start the combustion process, the design provides an additional air duct, which originates from the street. To prevent the steel from bending during heating, stiffening ribs in the form of corners are laid at the top of the firebox to the sides.

Let's consider another scheme according to which you can make metal sauna stoves with your own hands. These are models with air intake from the top of the firebox. They are also called gas afterburning furnaces. A steel plate is welded to it on the back wall. Air enters the furnace from under the grate and is supplied through air ducts going into the gap between this plate and the rear wall of the firebox.
This interesting design copes with two tasks at the same time: it cools the back wall, preventing it from burning out, and also supplies already heated air to the upper part, where very hot gases in the form of smoke are concentrated. 80% of their volume is flammable.

After mixing with air, they ignite, which leads to an increase in the temperature in the firebox and heating of the stones to higher levels. If you use dry firewood as fuel, you will need much less of it. Many long-burning stoves have been built on this principle of operation, but it has only recently begun to be used for sauna stoves. There is also a similar model without afterburning. By studying its drawing, you can better understand the proportions and placement of different elements.
This design involves building a firebox with a volume 30% larger than a heater. The ratio can be considered acceptable. The chimney is located offset back, which sometimes causes difficulties during its installation - the ceiling beam may interfere with it. In this case, it may be necessary to bend the chimney, which is not recommended.
In addition, before making a stove for a bath, you should decide whether a tank for heating water is needed in the steam room. Some people adjust the humidity level by opening and closing the tank lid. Other experts claim that heavy steam is generated in this way, so they advise installing the tank in the washing room, and heating the water using a heat exchanger built into the firebox, connected by pipes to the tank.

Now let's look at the diagram of a metal stove with a water tank. The design is considered to be quite well designed. Thanks to the spark arrester, the smoke travels a slightly longer distance, thereby better heating the walls of the firebox. Instead of a tank, of course, you can lay stones.
It is worth considering the option of installing a tank behind the stove. The chimney is moved back, passing through the tank. Due to the large height of the tank, there will be effective heat transfer, therefore, the chimney will not overheat when leaving it.
The heater has a design that assumes its small size, which is quite sufficient for small steam rooms. It has a lid, but due to its location, it can be difficult to close after water is supplied. But this design is easier to maintain.
Making a sauna stove
The main task of furnaces is to bring the temperature to the desired level as quickly as possible and maintain it at this level. To speed up this process, fans are used, which, by blowing on the walls, speed up the heating.
The convector casing is also designed for these purposes. The gap between it and the wall of the firebox should be 1.5-2 cm. Through the gap, air is sucked in, which warms up during movement, while the walls cool down.

To make a stove for a bathhouse with your own hands as high quality and practical as possible, its body is made of thick metal and the casing is made of thin metal, because it is not subject to overheating.
When placing the heater above the firebox, holes can be made in the body for ventilation. In this case, a portion of the air rising along the walls will be directed into the heater, blowing the stones and increasing their temperature. This ventilated heater is perfect for saunas.
Schemes and drawings of furnaces
Sauna stoves have a slightly simplified design. The dimensions of the metal sauna stove, and the firebox itself, should be sufficient to accommodate large logs. The sides of the heater are welded on top of the firebox, the volume of which, as a rule, is from 20 to 25 liters. The ratio in size may vary; there are no specific rules for this.
To make a metal stove for a bathhouse as correctly as possible, you should not install a tank for heating water. Otherwise, you will not be able to control the humidity level in the sauna, which can lead to burns in extreme temperatures.
There is another option - install the heater inside the firebox. A lid can be provided, and such a stove can have two operating modes: with the lid open - to keep the steaming process dry, and with the lid closed - to produce a larger volume of steam.
How to make a stove for a sauna: do-it-yourself metal sauna stove, metal stove, drawings, how to make it from iron, how to build, dimensions of iron sauna stoves, photos and videos
How to make a stove for a sauna: do-it-yourself metal sauna stove, metal stove, drawings, how to make it from iron, how to build, dimensions of iron sauna stoves, photos and videos
Metal sauna stove: manufacturing instructions
Today there are many designs of metal stoves: wood, electric and gas. Wood-burning appliances require a lot of fuel and careful maintenance, but they produce a “live” fire. Electrical devices are housings equipped with heating elements and heat insulators. Gas furnaces are the most modern and reliable; they have thermostats for power control and protective devices that are triggered when the gas goes out.
Advantages and disadvantages of metal sauna stoves

Metal sauna stoves have significant advantages over other heating structures:
- The small dimensions and mobility of a metal stove make it indispensable for small baths.
The disadvantages of metal stoves are:
- Rapid cooling due to the oven's inability to retain heat. Constant support for fuel combustion is required.
Material for a metal stove in a bathhouse

To make the stove, metal with a thickness of more than 5 mm is used; with a smaller value, the device will not last more than 5-7 years. Reputable stove manufacturers offer ten-millimeter steel products for fireboxes and slightly thinner ones for water tanks and stone bins.
Design of a metal stove-heater for a bath

A metal sauna stove consists of three main parts, such as a fuel combustion chamber, a hopper for stones, and a tank for heating water.
- The combustion chamber. This is where the wood burning process takes place. To control it, the firebox and ash door doors are used. The latter serves to supply air to the firebox. Removal of combustion products from the stove is carried out through an ash pan - a metal grate. From the firebox, the heat from the burning wood rises to the bunker with stones.
If the design of a metal sauna stove is clear to you, let’s move on to the process of its manufacture.
Making a sauna stove from a metal pipe

We will make the stove from a pipe with a diameter of 700 mm, its height will be 1600 mm. For work we will need: a steel sheet measuring 2200x1000 mm and a thickness of 10 mm, a metal pipe 1600 mm long with a wall thickness of 7-10 mm, a chimney pipe with a diameter of 100 mm with a wall thickness of 5 mm, a metal rod of 10 mm, a cast iron grate (from the store), door hinges - 8 pcs., latches - 3 pcs., drain valve for the tank, tape measure, building level, grinder, metal scissors, welding machine.
- We cut the pipe into two parts: one of them is 0.9 m long, the other is 0.7 m long.
Installation procedure for a metal stove in a bathhouse

Activities for installing a sauna stove begin at the stage of erecting the entire building - to install the device, a foundation is laid with a slight depth. A masonry of two rows of bricks is made on it, and a stove is placed on it.
- The minimum distance between the wall and the stove is assumed to be at least 1 m. In addition, it is recommended to install additional protection in the form of thermal insulation of the wall with foil with a layer of insulation. This will prevent the wooden wall from overheating and catching fire.
After installing the stove, you can line it with bricks using clay mortar. This will improve the appearance of the device and save people from the possibility of burns. The stove with lining can be placed closer to the wall.
We hope that the above will convince you that making a metal stove for a bathhouse is not so difficult. If you have metal cutting and welding skills, you can use a simple drawing to make a homemade stove that will be no worse than a purchased one.
DIY metal sauna stove
Homemade metal stoves for baths have always competed with their brick counterparts. This is due to the fast heating and simple installation of such units. With manufacturing instructions
Assembling a sauna stove with your own hands from metal
A lot of do-it-yourself sauna stove designs made of metal have already been made and invented, but the topic has not been fully explored and is still relevant. You can make metal sauna stoves with your own hands from available metal materials; you just need desire and a little time.

DIY metal sauna stoves
After looking through this article and following the technology, as well as adding imagination, you can come up with something yourself. As a result, you will not only have a great time in the sauna, but also surprise your neighbors and friends with unique solutions. We'll tell you about some in more detail. We will figure out how a metal furnace can be made, what its dimensions and structure should be, and we will also tell you how to prepare the base (foundation) to install the assembled structure.

Stove with stone grate and water heating
What do you need for work?
If you are going to build a metal sauna stove with your own hands, then you first need to draw up a project, determine the dimensions of the unit, and also prepare everything necessary.
Tool
- Welding machine.
- Electrodes with a diameter of 3-4.
- Bulgarian.
Material metal
If you are making a homemade sauna stove from a pipe, you will need:
- Wheels - 4 pcs.
- Pipe with a diameter of 100-150 mm.
- Sheet iron 2-3 mm thick.
- Iron fittings with a diameter of 8-10 mm or rod.
Construction material
- Brick - 300-350 pcs.
- Cement - 2-3 bags of 50 kg.
- Crushed stone, sand - 0.1 cubic meters.
Please note: draft is created by discharge, i.e. discharged cold air draws out warm air. Warm air, in turn, tends upward under the influence of Archimedes' force. The draft depends on the weather: in summer the air is warm and humid - the draft is naturally less, in winter the opposite is true. The draft also depends on the diameter of the pipe.

Drawing of a heater stove
If the pipe is thin, then gases and warm air will be slowed down by friction against the walls of the pipe and will not have time to leave the chimney. As a result, it is created smoke plug and the smoke follows the path of least resistance, i.e. into the room.
Therefore, when making a metal sauna stove with your own hands, always follow the principles of pressure, drafts, correctly choosing the dimensions of the chimney and firebox. If the pipe is wide- smoke and gases will slowly rise upward, the draft will be poor and the pipe will be very clogged, it will have to be cleaned very often. Since everything will settle on the walls of the pipe, the normal speed when exiting the pipe is 5-8 m/s.
For the first time, the Romans began to use chimneys (3-8 centuries BC) - famous roman baths.
Furnace construction work
So, let's start building a metal sauna stove with our own hands. First of all, you need to prepare the foundation, that is, the base on which you plan to install the structure. Despite the fact that an iron stove for a bathhouse made from a pipe weighs little, it is imperative to prepare a foundation for it. It is very important that the iron stove is installed on a level foundation.
We are building the foundation
- For the foundation for the stove, we knock down the formwork, its dimensions are 1x1 m, height 20 cm.
- We reinforce the future foundation in one layer, laying reinforcement along and across in squares 20x20 cm. We tie the reinforcement at the points of connection with each other with knitting wire. It should not lie on the ground; to do this, we drive it into the ground along the edges of the grate. 4 pieces of reinforcement and tie a lattice to them in weight. Before you start pouring the foundation, make sure the grate is in the middle.
- After pouring, we maintain the foundation about 2 weeks, open all the doors and windows in the bathhouse for better ventilation and lay wet rags on the poured foundation. This is done so that cracks do not form when drying. We wet the rags for 2 weeks.
Preparing and assembling the oven
An iron stove is assembled like this:
- Take the rear rim from the wheel, weld all the holes except the one in the middle.
- Let's take the next rim, cut off the convex top, insert the first rim into the second and brew. There should be no holes or cracks, the device must be airtight, after welding we beat off the slag and check the welding seam; if it’s not finished welding somewhere, we finish welding it, check it again by knocking off the slag.

Moments of assembling a sauna stove

Assembling parts of the 2nd stage of the furnace
Let's make a small digression here. If you already have a dressing room, then before installing a new stove, you will have to cut a square hole in the wall, because the stove will start from there - these are the doors of the vent and firebox, everything else is in the bathhouse.

Drawing of the oven interior
If you did not have a dressing room, then we will build it along with a stove for the bath. The corner in which the iron stove stands should be lined with a brick wall, this is done for the purpose of fire safety, because the inside of the bathhouse is always decorated with wood.

So, let's start making a stove; if you have no experience in stove making or have never laid a brick, then it is better to call a master who will build a stove for you according to all the rules. But if you want to try it yourself, which is not bad, then it’s time to try it, and I’ll tell you how to do it.

- We lay out the base completely from bricks, and in the second row we begin to lay out the ash pit (ash pit).

Ash pit, ash pit
After laying the stove should dry for at least 2 weeks, if you flood it immediately, microcracks will appear, which will compromise the integrity of the stove. We open all the blowers and entrances and exits so that the oven dries out. You can heat it with small wood chips for a couple of hours. The stove is considered dry if there is no moisture and the walls were all dry. You can run the oven fully for maintenance, and the oven is ready for use.
- Now let's look at the pipe; the figure shows the finished type of pipe that is placed on the stove we have folded.
- In an iron stove, the heater is located directly on the body itself, in ours it is located on the pipe, and there is also a hot water tank there.

The oven itself is assembled
I note that the design itself will be quite heavy, so it can be divided into parts and assembled indoors. A do-it-yourself metal sauna stove of original design is ready. If there is already finishing inside, cover it from welding with roofing felt or sheets of iron.
Attention. Don’t forget, when welding indoors, for fire safety purposes you need to have a bucket of water and a spray bottle. A sprinkler can be made from an ordinary one and a half liter plastic bottle by punching a hole in the lid. After welding, spray the seam and scale.
- Chimney top (see Metal chimneys) reinforced with two reinforcements for rigidity, weld it to the pipe and attach it to one wall and to the other. To attach to the wall, we use a corner or plate welded to the reinforcement and drilled on both sides.
- We drill the brick with a hammer drill with a drill with a diameter of 6 mm, 5-6 cm deep and attach it to anchors, so we have stiffness angle and stable design.

Full view: do-it-yourself metal stove for a bathhouse

Do-it-yourself metal sauna stove with stone grate
Options for assembling a furnace of a different design
DIY metal stoves for saunas come in different shapes. Consider the oven, assembled from a pipe, its components and assembly diagram. At first glance, a pipe bath stove has the simplest possible design, but it has its own tricks and design technology. At the beginning of the article, I indicated the operating principle of the stove, draft and chimney. In all cases these principles must be used, otherwise the oven will not work.

DIY metal sauna stove with built-in heater
If you independently implement the design and some original solutions so that you can create a metal sauna stove with your own hands, follow them, and you will succeed. Don’t forget that nothing is impossible for you and me, so we will dare, strive and surprise others by improving our skills. Then a do-it-yourself metal sauna stove or just a stove will not be an unread book for you. The oven in the photo above is a simple option, since the base is almost ready - a piece of pipe with a diameter of 525 mm and a length of 650 mm.
From below we cut a hole measuring 335 mm in length and 180 mm in width, this will be our grate, we weld on rods or an iron strip, about 1 cm apart from each other. Separately, we make a box from sheet iron 2-3 mm in size:
We weld the box and clean out the slag.
We weld the door to it and put the part aside for now. Let's work on the 525 pipe, we need to cut out the plugs and sidewalls on both sides.
- Our pipe diameter is 525, divide by 2, we get 262.5 mm.
- Using a compass, having measured 262.5, we draw 2 circles, although it could be simpler. Place our blank (525 pipe) on the sheet and simply trace it.
If you need to copy several parts, then you should always copy from the original, and not from their finished copies, since dimensional accuracy is lost. If you have marked a part and cut it out, it is better to take the measurement again and make another one than to copy from a finished one.

DIY metal sauna stove with a large heater
For now we will make the parts, but we will carry out the assembly in order. First, we will make the insides of the stove and assemble them inside the stove itself; we will layer and boil all the other parts one by one.
We cut two holes at the top. One is for the chimney, round, with a diameter of 110 mm, departing from the edge of the 525 pipe to the middle (of the chimney 110 pipe) 100 mm. The other is square, for a heater, stepping back from the edge of the 525 pipe 215 mm, cut the size along the 525 pipe 300 mm, across 250 mm. To maintain symmetry of the design, use a level(vertical, horizontal) or plumb line(vertical). For the cut hole, prepare a niche for the stones, cut out the parts from a 5 mm sheet of iron.
We weld all the parts, make a square box as shown, clean it of slag, coat the seams generously with kerosene and check for any leaks. We set the finished part of the furnace aside.
A plumb line can be made from any heavy load (bolt, nut, pebble, nail) and any rope, fishing line, thread. But the weight of the load must keep the ropes, fishing lines, and threads taut. Gravity will do the rest; a thread with a load hanging on it always shows the vertical in an ideal form, just as water shows the horizontal line.

Do-it-yourself metal sauna stove: drawings
Next step: cut out a 4-5 mm partition for the furnace shaft from a sheet of iron (separates the firebox from the chimney, thereby preventing the rapid leakage of heat into the chimney).

Partition for furnace shaft
As shown in the figure, we measure 180 mm from the top and in fact, that is, what the size will be, we will only find out as we progress. Measurements can be made using a tape measure and level. We set the level, mark from the top 180 mm to the top of the level. For the record, I’ll tell you how to make do with improvised means, if there is no level, and mark the horizontal line. We take a transparent glass vessel, it can be a glass, a plastic bottle or any transparent, but fairly solid object with a base.
From the bottom we mark the same distance on the sides and put marks with a marker. We pour water according to the marks - and there you go. level ready. We place it on the surface we need: the water should be at the level with the marks, then we will have a horizon level.
- We set the level itself, not forgetting about the size of 180 mm, it must be observed, press the level to the pipe so that it does not move around, and put marks inside along the edges, with a marker or chalk. We perform the same procedure on the other edge.
- Taking a measurement from mark to mark.
- Drawing a partition on a piece of metal and cut it out.
- We take a niche for stones, insert it into the prepared hole, make a couple of potholders on the side and turn the pipe over (the niche for stones should be at the bottom).
- We insert the partition according to the marks made, if everything fits, then we begin to scald the partition, if not, we make marks where exactly it does not fit or is in the way, pull out the partition, and trim it with a grinder. If there are gaps, it’s okay, it’s welded by electric welding.
- We also scald the niche for the stones.
So, a DIY metal sauna stove is the next stage of assembly. We have plugs or sidewalls. On one we make markings for the firebox door, departing 50 mm from the bottom, and cut it to the size of the door, which we have prepared in advance with one clarification: we make a hole along all edges less by 1 cm. If our door size is 220x320 mm, then we cut a hole 210x310 mm. And we cut another hole for cleaning the chimney 70x130 mm.

Do-it-yourself metal sauna stoves with a tank for heating water
If a do-it-yourself metal stove for a bathhouse does not have a direct exit from the firebox into the chimney, but with shafts, then you should always make holes for cleaning the chimneys if it is impossible to get there. If this is not done, then ash sediments and small particles of ash and soot will soon reduce access to the chimney and the stove will begin to smoke. You will have to either cut a window, or cut down and weld the pipe permanently.
- First we install the side panel with the future door, scald the outside. Through the firebox window we weld the partition to the sidewall. We will install the firebox door at the last moment. Now we weld the other sidewall, which we have without holes, and clean everything with a grinder.
- Place the chimney in the cut hole, grab it, take a level and measure the vertical on both sides, not parallel, but at an angle. So that the chimney is not blocked. We scald everything, set the pressure for the chimney below.
- Next stage: put the ash pan- blow from below, closing the grate, and scald it.
- AND completion of assembly- We weld the doors to the firebox and to the hole for cleaning the chimney; the ash pan has a door. And weld the legs.
All that remains is to install the stove in its intended place. In this case, the installation is carried out so that the heater is located not in the stove, but outside, which makes heating the stones difficult. There will be stones take much longer to heat up than usual, but the effect will still be there. It is better to use stones for the stove maritime, they heat up faster, retain heat longer, and when they contain salt and iodine, they have a beneficial effect on the body. A very important detail. If you have made an iron sauna stove with your own hands, then you need to install it so that the floor under the ash pit is made of tin or tiles, generally made of non-combustible material.
Do-it-yourself metal sauna stove: assembly
Step-by-step guide to assembling a sauna stove with your own hands. Materials and tools required for the work. Detailed step-by-step description of actions when
DIY metal sauna stove
There are plenty of types of stove equipment: some prefer a brick heater built by a professional craftsman, while others prefer a metal stove constructed with their own hands.
The last option is economical, as it can be made from scrap materials with your own hands.
Advantages of the unit
The following main ones can be identified positive points, which a metal sauna stove is equipped with:
- Compactness and small parameters make it possible to install such a design even in a small room.
- There is no need to build a special massive foundation. A lightweight base is also suitable for such a stove. And this greatly simplifies the process of installing furnace equipment.
- In a metal sauna stove, a constant combustion process can be maintained, which allows you to maintain the temperature at a given value throughout the entire sauna procedure.
- An economical option for furnace equipment, the possibility of constructing the structure from existing materials.
Disadvantages of a metal sauna stove
Despite the presence of positive aspects, a metal sauna stove also has its own minuses :
- cools down very quickly, since there is no property of storing thermal energy. In order to maintain a high temperature in the bathhouse, it is necessary to maintain a constant combustion process.
- low ability to heat a large room;
- the need to provide special protection from fire situations, since the fire safety of metal structures is low. It is recommended to install additional casing trim.
Choosing a shape for a metal sauna stove
To many, such a parameter as the shape of the structure will seem unimportant. In fact, the configuration affects the performance of the equipment and the convenience of its use during operation. The furnace unit is:
The last type is the most common and easy to use. With this configuration, the furnace has corner zones that are subject to minimal heat. That is why many believe that a rectangular design best preserves the shape and frame of the stove.
The shape of the stove also affects the uniformity of heating of both the structure itself and the heated room. When one element of equipment is heated to maximum, the heating of another decreases. This, in turn, ensures uniform heating of the room and a stable balance of heat flows.
Proper heating of the structure affects its mechanical stability. Thus, a round or cylindrical oven is characterized by a low degree of resistance to heat, so it has denser walls. A rectangular oven is considered heat resistant because it has cold corners.
Options for a do-it-yourself stove structure
Metal sauna stoves, one might say, already have a long history, so over such a long period craftsmen have developed and proposed various types of designs.
The simplest option is a metal stove made from an iron barrel. To do this, the bottom and lid of the barrel are cut off, resulting in a cylinder. Up to half of this cylinder is loaded with bricks placed on edge. A grate is placed on top of them. The remaining half of the barrel is filled 2/3 with stones. After this, the chimney is removed and the lid is installed on the stove. This method of making a stove, although simple, is inconvenient to use.
For a small bathhouse, you can build a compact-sized stove-heater using sheet steel. The inner surface of this structure is lined with bricks. The firebox, its walls are laid out in half a brick, the chimney - in one quarter. This type of stove is easy to make and use. To warm up the room you will need some fuel raw materials. A comfortable room temperature will be achieved after a short period of time.
Manufacturing process
Whichever design option is chosen, You will need to prepare the following material:
- sheet steel, the thickness of which is not less than 8 mm;
- metal pipe with a wall thickness of 10 mm, a diameter of 50-60 cm;
- rod 10 mm thick;
- grate;
- latches and doors for the combustion chamber, heater and blower;
- water tap;
- two meters of pipe. Of this, 90 cm will be used for the firebox, 60 cm for the tank, and 50 cm for the manufacture of secondary parts.
By the way, you can make doors for structural elements yourself.
Concerning tools, then in our work we will use a grinder and a welding machine.
Option 1: stove design with a closed heater type
In this type of construction it is assumed closed view of the heater, therefore, to splash water to supply steam, you will need to open the door.
A design such as a do-it-yourself metal sauna stove has the following steps:
- We take a large piece of pipe, the diameter of which is at least 50 cm, and cut an opening in it for the blower. The size of the latter is 5x20 cm.
- Inside the pipe, on the side of the opening, we weld fastenings for the grate, using any metal plate with eyes.
- We move on to arranging the firebox: we cut a 25x20 cm opening, weld the fasteners for the heater rods. We will use rods 1 cm in diameter, or specially sold grates for a circular oven.
- On the opposite wall of the heater we cut a hole through which steam is supplied.
- We fill the heater with stones suitable for this type of construction. Soapstone and diabase have good properties that are combined with a metal surface; flint, granite, and mica-containing stones should be excluded.
- We cut a hole in the stove cover for the chimney pipe and install it.
This completes the manufacturing process of the stove structure. But still, the craftsmen propose to improve the design by adding hot water tank .
To do this, take a piece of large diameter pipe and weld in a water tap. We prepare the lid for the water tank: take the lid of the required size and cut it into 2 equal parts. In one part we cut out an opening for the chimney, and then weld it onto the tank. The second part will be removable, so we weld hinges and a handle to it.
Option 2: stove with an open type heater, constant heating
Having a metal sheet it is easy and simple to build such a unit. His the design is a pipe divided into two compartments using a grate. The upper compartment is the firebox, while the lower one acts as an ash pan. Each compartment is equipped with a door through which you can add fuel, provide air supply, and remove combustion products.
At the far, plugged end of the pipe we weld the chimney pipe, its diameter is 100 mm.
We weld a metal box on top of the cylindrical body, which is filled with stones. The curved chimney elbow allows for maximum heating of the stones, since this increases the contact surface of the hot pipe with the heater.
The described version of the furnace structure can easily be made in the form of a parallelepiped. In this case, you will need sheets of metal for the blanks, not a pipe.
As a rule, such a stove requires a water heating tank. In a rectangular oven ways to place the tank many, here are just a few:
- can be done on either side;
- attach on top;
- make a water jacket on several sides;
- install pipes for cold water supply and hot water intake.
A convenient way to obtain hot water is to install a special heat exchange tank on the chimney pipe. You can make such a water heater yourself, or you can buy a ready-made factory one, which has a pipe of a standard size and diameter. In the latter case, the tank crashes into the chimney, its vertical part above the stove body, and pipes for water supply and intake are connected. Such a tank, with sufficient volume, can serve as a water reservoir or simply be a heat exchanger connected to the main water tank.
Option 3: open metal stove with additional brick walls
This type of furnace equipment is complex to implement, but this is justified by the acquisition of the ability to accumulate heat.
This design is metal body with internal brickwork. At the same time, the requirements for steel thickness are reduced: you can take a sheet 2 mm thick. For brickwork you will need fireclay bricks and mortar. A special ready-made dry mixture for furnace work is suitable as a solution. It is mixed taking into account the requirements of the instructions for use.
A do-it-yourself metal sauna stove has the following manufacturing technology:
- Preparing the base: We weld the legs and heel pads to it. This will make the furnace structure stable.
Diagram of a metal sauna stove with an additional brick wall
- We lay the first continuous brick row on this base. For the remaining rows we adhere to the following parameters: near the firebox we place half a brick, in the area of the chimney ducts - a quarter.
- When the blower chamber is ready, install cast iron grate , placing it between the firebox and the ash pan. To create openings for the loading window and the blower, you can use metal corners measuring 20 x 20. It is important to ensure the evenness of the row seams.
- We place it above the combustion chamber metal grille made of rods , the diameter of which is 12 mm. We will then place stones on this grid.
- When the masonry reaches the level of the heater, you need to leave it on the right or left opening We will load stones into it, take them out for cleaning, and also splash water into this window during the bathing procedure to create steam.
- Chimney channel It is advisable to make it tortuous. This will ensure maximum heating of the entire furnace body and complete combustion of fuel resources. In the place where the pipe turns upward, on the back side, we create an inspection window. We install a valve in it, which allows us to retain heat for a long time after the end of the combustion process.
- We lay the top two rows of bricks solid, leaving opening for installation of a chimney pipe , through which combustion products will be discharged.
- After finishing the brickwork, give the mortar time to set and dry. After this, we proceed to welding the walls of the metal body. In our situation, this case resembles a kind of case. A corner, 20 x 20, placed along the joints, makes it easier to weld and make the seams airtight.
- Carrying out the workpiece anterior wall , do not forget to cut openings for the ash pan and the loading chamber of the firebox. We install the front wall in place and weld the hinges for the doors. We make the door leaves 10 mm wider on each side than the prepared openings - this will ensure tightness when closing. You can lay an asbestos seal around the perimeter of the door or along its entire inner surface.
- In the side wall blank we also provide an opening for the prepared part in the brickwork windows for steam generation . To do this, we install a metal door with sealing material. It is advisable to make it open downwards, install a cold handle for opening during the bath procedure, when there is a need to supply steam.
- Cut out on the oven lid hole for chimney pipe , after which we weld the lid into place. Next, we install chimney channel and scald it.
- We install a metal sauna stove with our own hands in the chosen place and load it with stones.
Rules for installing a metal sauna stove
- install a metal sauna stove with your own hands at a distance of at least 1 meter from the walls of the sauna;
- the structure must be located in close proximity to the chimney;
- making a special foundation, a base made of refractory materials for placing the furnace;
- the wall of the room near which the metal sauna stove is located should be finished with sheet fire-resistant material.
Do-it-yourself metal sauna stove: photo drawings
Metal sauna stove: advantages and disadvantages, drawings, photos, 3 options for making a metal unit with your own hands. Video instruction.